For those of you who follow me on {pinterest} you may see that I have an obsession overwhelming interest in Entryways and Hallways. I just love this part of the house because it’s the first place people see when you walk into a home. I lean towards grand architecture but simply designed…ones that play into the “white washed style” but with pops of color or pattern. I’m constantly dreaming – seriously everyday – of how to transform our entryway…
On the home renovation spectrum we need to paint stairs, banisters balustrades and re-stain the stair floor boards. Then on the decorating spectrum we are in desperate need of new carpet and some fresh paint!
But for now we just need a to crate a “Moment”! For Andy that means a place to throw down the keys and for me a place to set down my coffee cup!!!
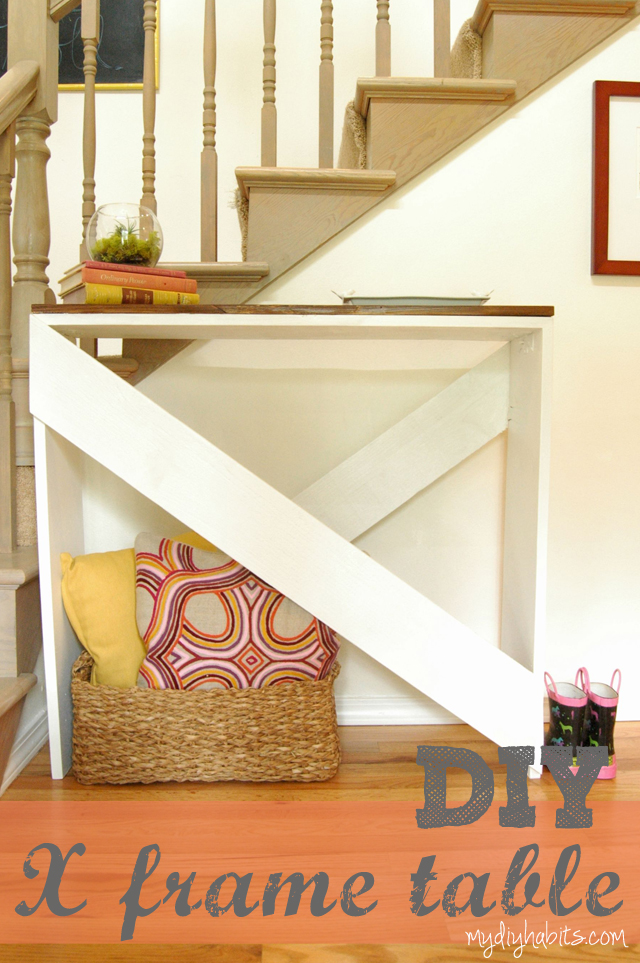
A few weeks ago I found this {X Table How To on Thrifty and Chic blog} and thought…how great for our entryway! We defiantly needed something custom fit to this slightly awkward space; depth, height and length are not standard dimensions. And….well…I’m cheap so when I saw how inexpensive the materials are I jumped at the chance to not spend a dime over $20!!!
I took this inspiring project and gave it a “twist” to fit my style. I love love love white and dark wood right now…you’ve all seen my love for this before with my Chevron Wood Storage Bins. So I modified the design and added on two planks of reclaimed fence wood…I have piles of it since we are in the middle of a rebuilding our fence (more on that this week).
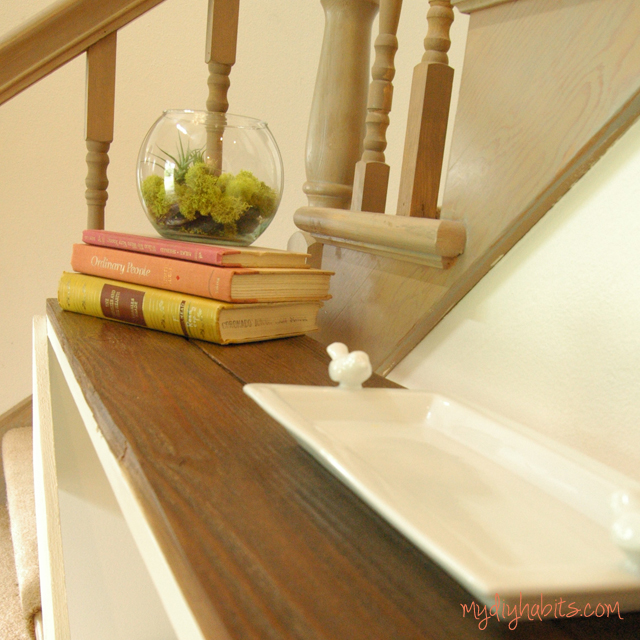
The reclaimed wood is gorgeous and the textures and years of weathering gives the wood some serious character!
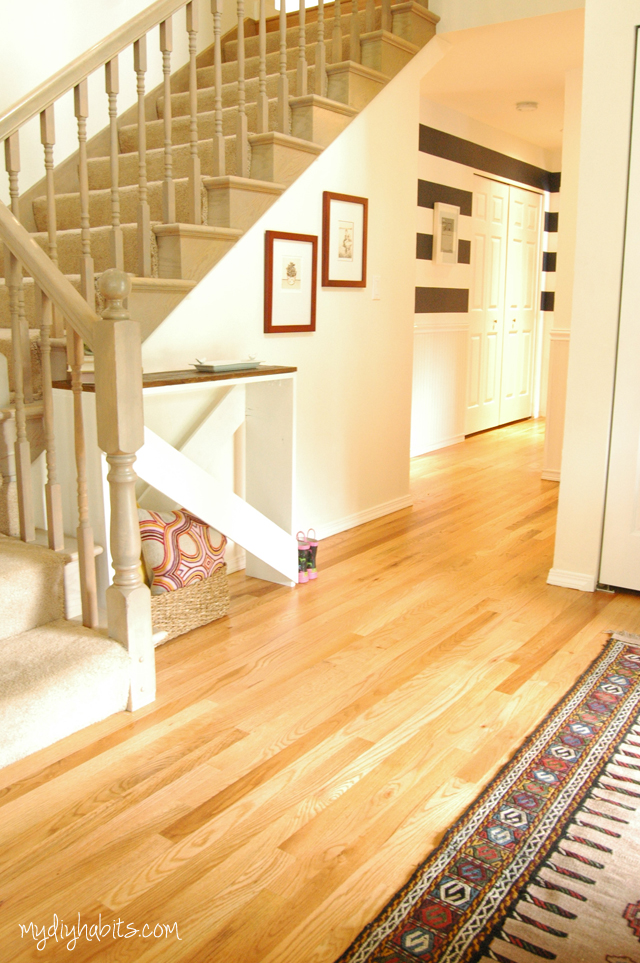
Here is a quick recap of the steps I took to build this X Frame Table…but the link above to my inspiration piece has more photos if you are a visual “how to” person.
X Frame Table Materials and Price List:
1 Pine Plank 10″ x 8′ – $10
2 Cedar Planks 4″x6′ – $3×2 = $6
2 – Metal framie things (technical term, see picture) – $1×2 = $2
Wood Glue
Finishing nails and screws
Primer
White Paint
Reclaimed Wood
Dark wood stain
Sanding materials
Polyurethane High Gloss
Total Cost = $18ish dollars!!!
X Frame Table How To:
- I Cut the pine down to 3 pieces – desired lengths (1 table length and 2 leg height).
- Then I secured them in place with wood glue and the metal frames, one on each side of the table.

- Once the table frame is built use the 2 cedar planks to create the x frame…these are cut on an angle…I just cut them at the appropriate degree…this will vary depending on your own table dimensions…secured these on with wood glue and finishing nails.

- I then primed the piece using m favorite Zinsser primer.
- I cut 2 of planks of the reclaimed wood down to size and sanded them…they were so grimy it was hard to even see the wood designs!
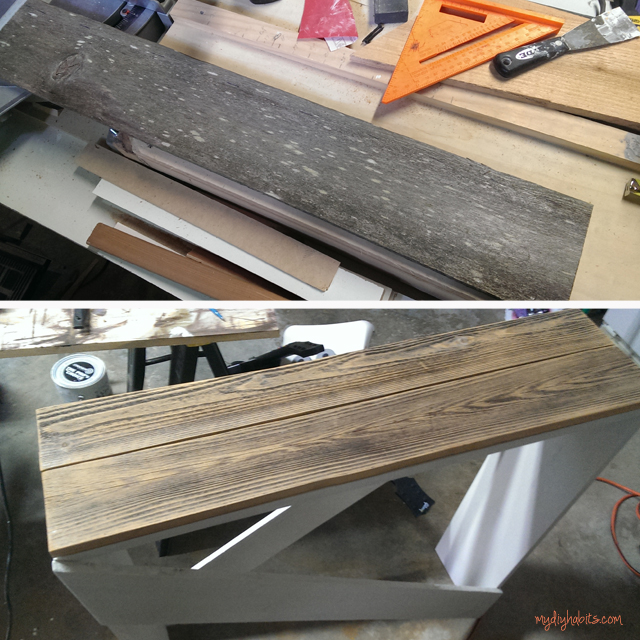
- Reclaimed wood planks are secured on by wood glue and then I wiped on some of the dark wood stain. (I decided not to paint on because the wood just soaked up the stain…wiping gave me more control over the final product color.)

- Then I gave the Table one coat of Benjamin Moore Advance paint in White Dove (because I have so much left over) and gave the reclaimed wood a coat of polyurethane gloss finish.
X Frame Table Project Time Frame:
1 hour to build the table
30 minutes to stain and paint
15 minutes to add polyurethane finish
Total Time 1 hour and 45 minutes
And one more shot because the Teddy Photo Bomb is sooo priceless!!!
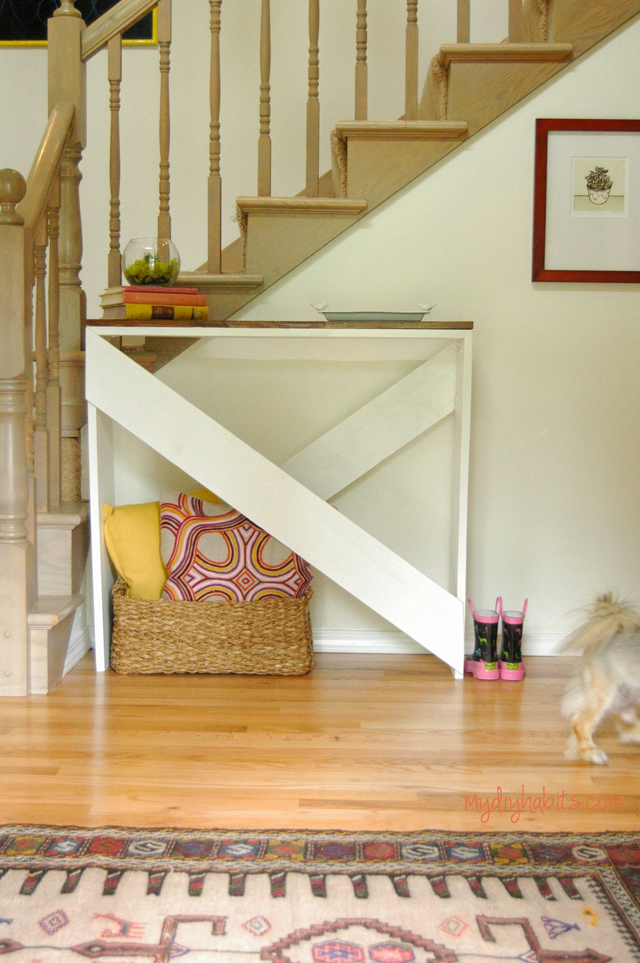
So I hope you like the $20 X Frame Table. Who knows if it will stay when we get our final carpet and stairs upgrade completed, but if it doesn’t I won’t feel guilty because, well, it was $20!!!
